This step by step procedure was developed to instruct how to download the data used for the Recommended Practive for Burn Severity assessment.
Download the shapefile
The study area that was used for the recommmended practice is Empedrado Commune, located in the Province of Talca, Maule region, Chile. The shapefile was obtained through the Universidad de La Frontera, Temuco, Chile (Albers, C., 2012. Coberturas SIG para la enseñanza de la Geografía en Chile).
To download the shapefile, please click here.
Download the images
1. Open the EarthExplorer website
For this procedure, the USGS EarthExplorer website was used to download the images. However, any other imagery data source could have been used.
If you are already a registered user at the EarthExplorer website, please go to step 4, if not, continue to step 2.
2. Register as a user
On the upper right corner, click on the link Register to sign up as a user, as indicated in Figure 1. Follow the instructions to register.
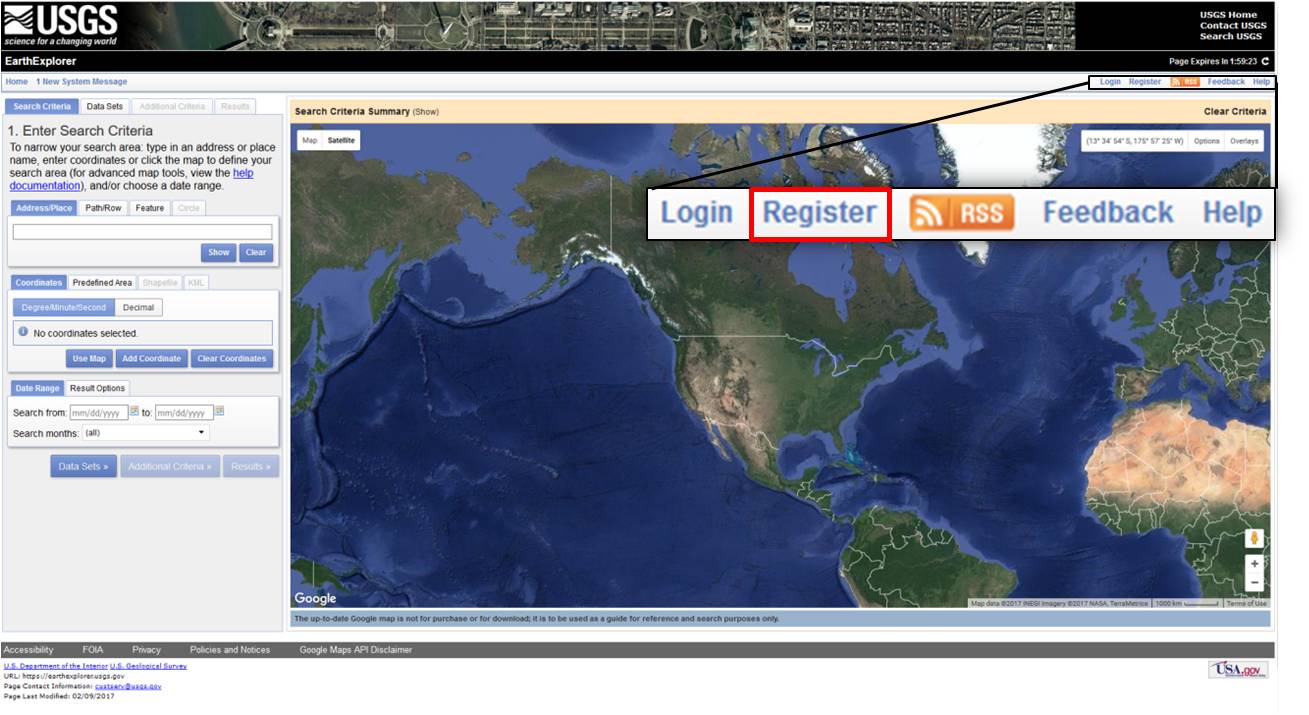
Figure 1. Registering as a user.
3. Activate your account
You will then receive an email with instructions on how to activate your account.
4. Login to USGS website
Please go back to the USGS website to sign in as a user by clicking the ‘Login’ icon next to the 'Register' icon, on the upper right corner. After logging in, you should see your user name in the top right corner, as shown in Figure 2. In this example, the username is 'pfliana'.
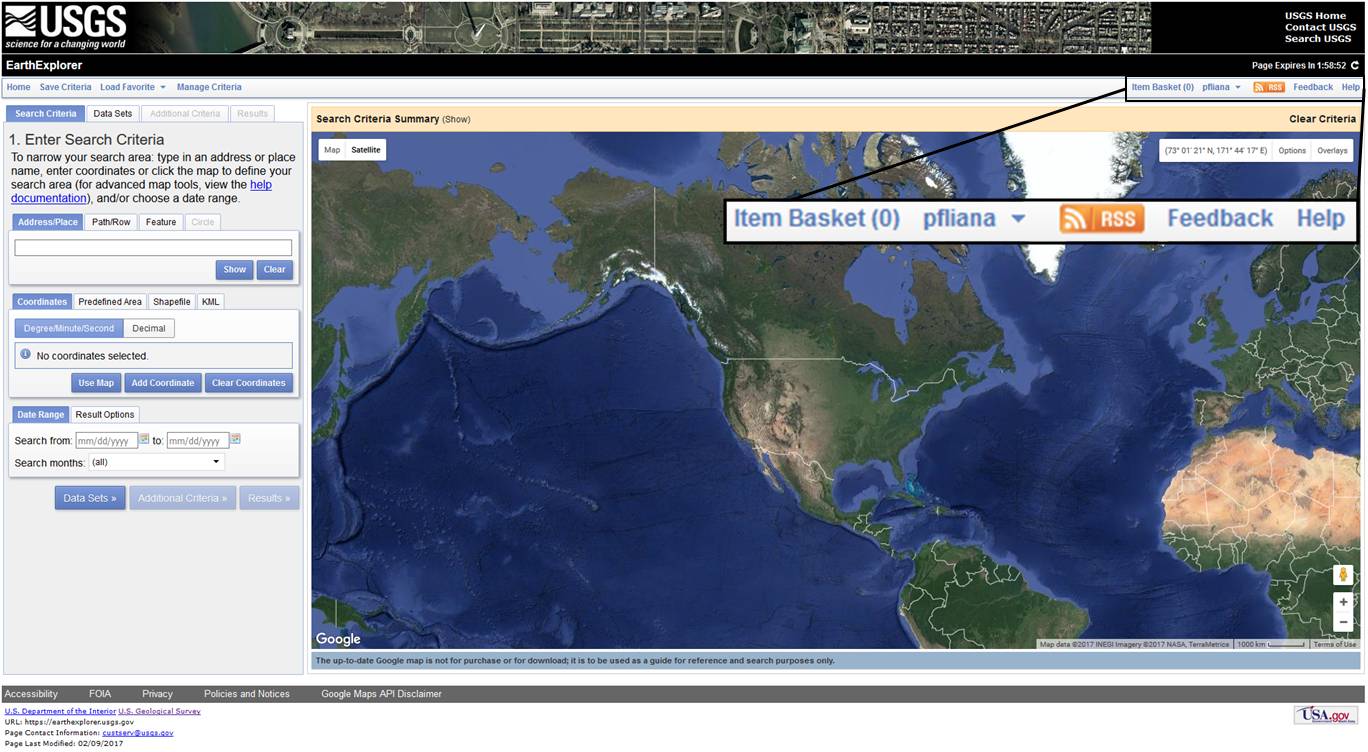
Figure 2. Your user name shown after loggin in.
5. Enter search criteria for Address/Place as 'Empedrado, Chile'
After entering the search criteria for Address/Place as Empedrado, Chile, click show. It will return a search on all addresses and places that match the name typed. Click on the name that matches the searched criteria. During this practice, there was only one place returned by the search, as shown in Figure 3. After clicking on the matching address/place, the website will display where the place is located.
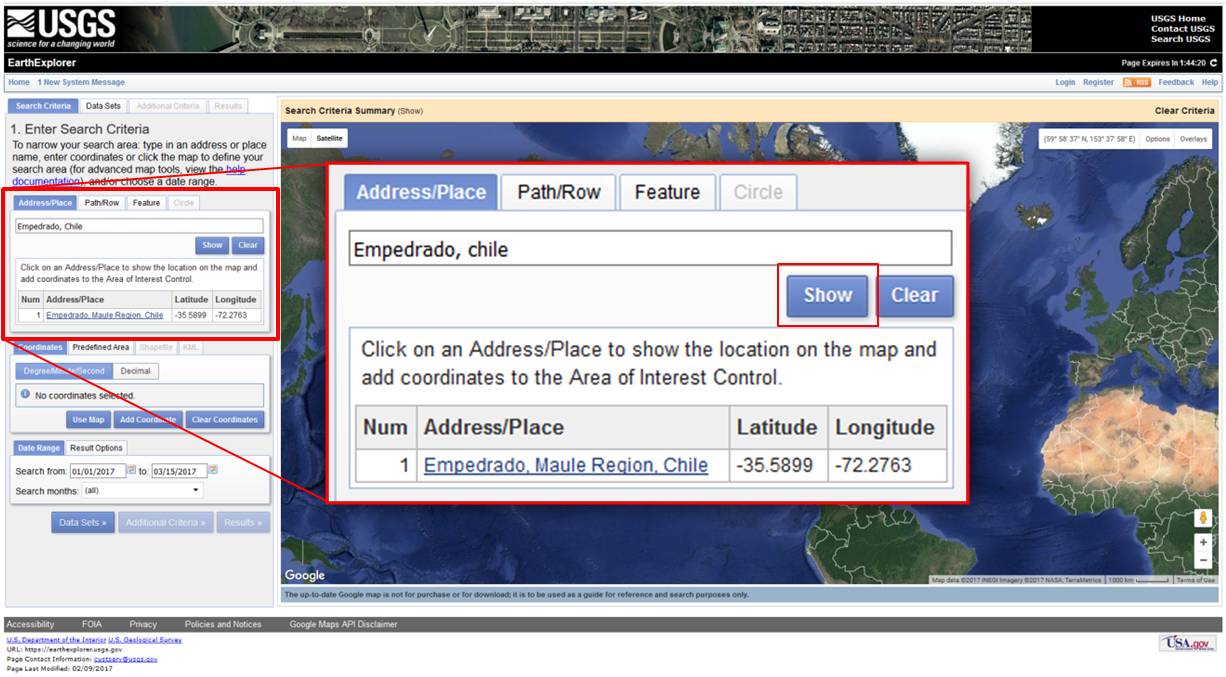
Figure 3. Searching images for Empedrado area.
6. Enter the date range as '01 January 2017 to 15 March 2017'
The data range should also be filled out to narrow down the image search to specific dates. For this practice, the data range chosen was from 01 January 2017 to 15 March 2017 (Figure 4). To proceed, click on Data Sets.
TIP: It is good practice to keep the data range search flexible, i.e. searching beyond the specific days. Keeping the data range flexible will allow you to decide what images are most suitable for the intended goal; for example, taking cloud coverage into consideration.
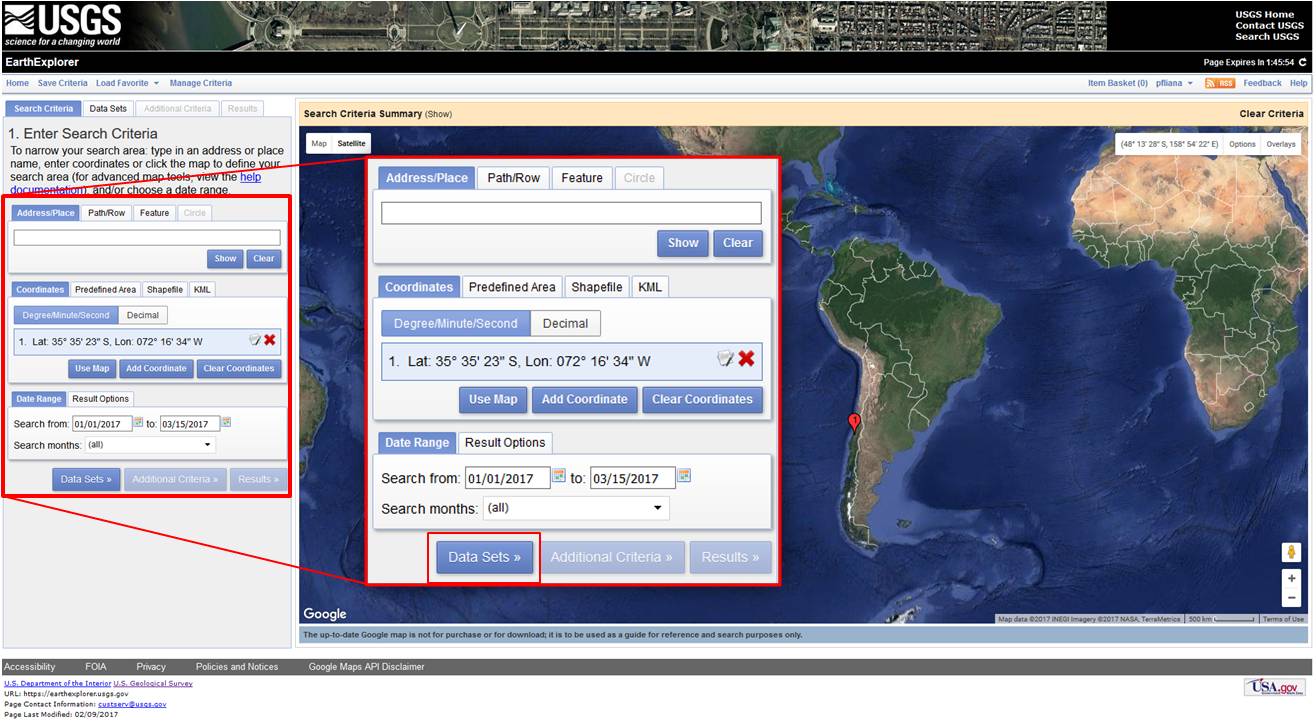
Figure 4. Entering the date range.
7. Select the data set(s) for Landsat 8
Please click the plus sign next to Landsat to show a list of data sets. Then, click the plus sign next to Landsat Collection 1 Level-1 to select Landsat 8 images (shown as Landsat 8 OLI/TIRS C1 Level-1 on the list). This step will check data set(s) you would like to search. When done selecting data set(s), click Results.
TIP: Any data set(s) can also be searched by name, directly on the Data Set Search box. If you would like a more specific search, please go to Additional Criteria where other options can be selected, such as the sensor ID, data type and cloud cover (percent).
The blue box highlighted in Figure 5 indicates the Landsat images already processed for Surface Reflectance. As for the Normalized Burned Ratio, it is recommended to use the surface reflectance, as these images would be ideal. However, only Landsat 8 scenes acquired from April 11, 2013 (DOY 101) through December 18, 2014 (DOY 352) can be processed to Surface Reflectance. This is due to the change in the Thermal Infrared Sensor (TIRS) acquired data (please see the 22 December 2014 Landsat Mission Headline for more details. Therefore, as the processed images are not ready to download for the applied date range, the recommended practice also addresses the surface reflectance imagery processing.
Read more about it at the Product Guide for Provisional Landsat 8 Surface Reflectance Code (LaSRC).
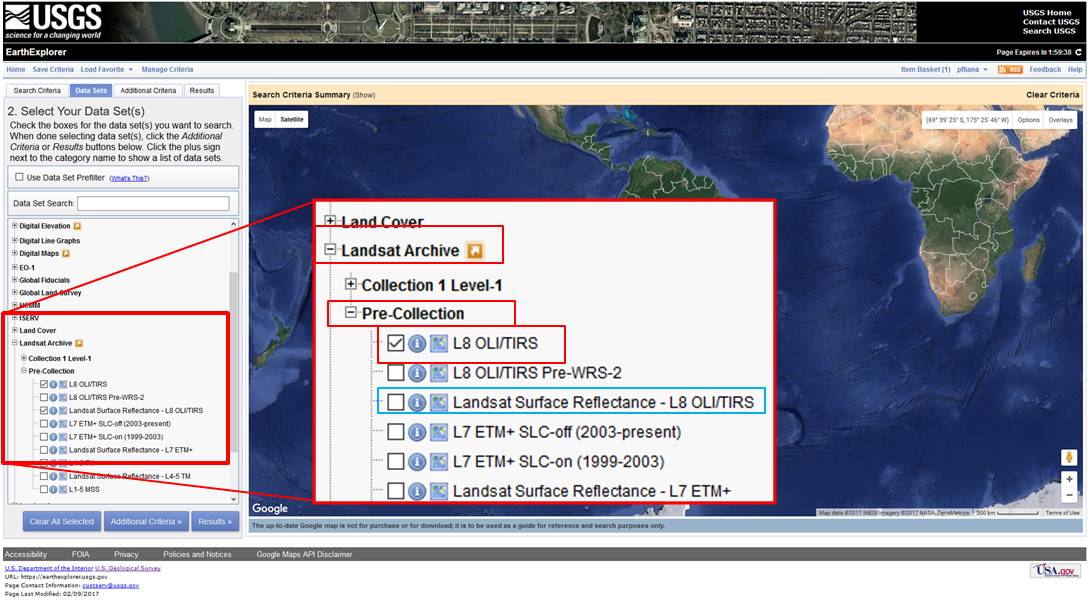
Figure 5. Select the Landsat 8 images (L8 OLI/TIRS).
8. Find the images to be downloaded
After clicking Results, select the images for download by clicking on the icon highlighted in red in Figure 6. Please note: the search will return images of two different paths from the same row, paths 001 and 233. For this practice, the images used are from path 001. Please download the 08 January 2017 image representing the pre-fire and the 25 February 2017 image, exemplifying the post-fire, i.e. after the fire was extinguished.
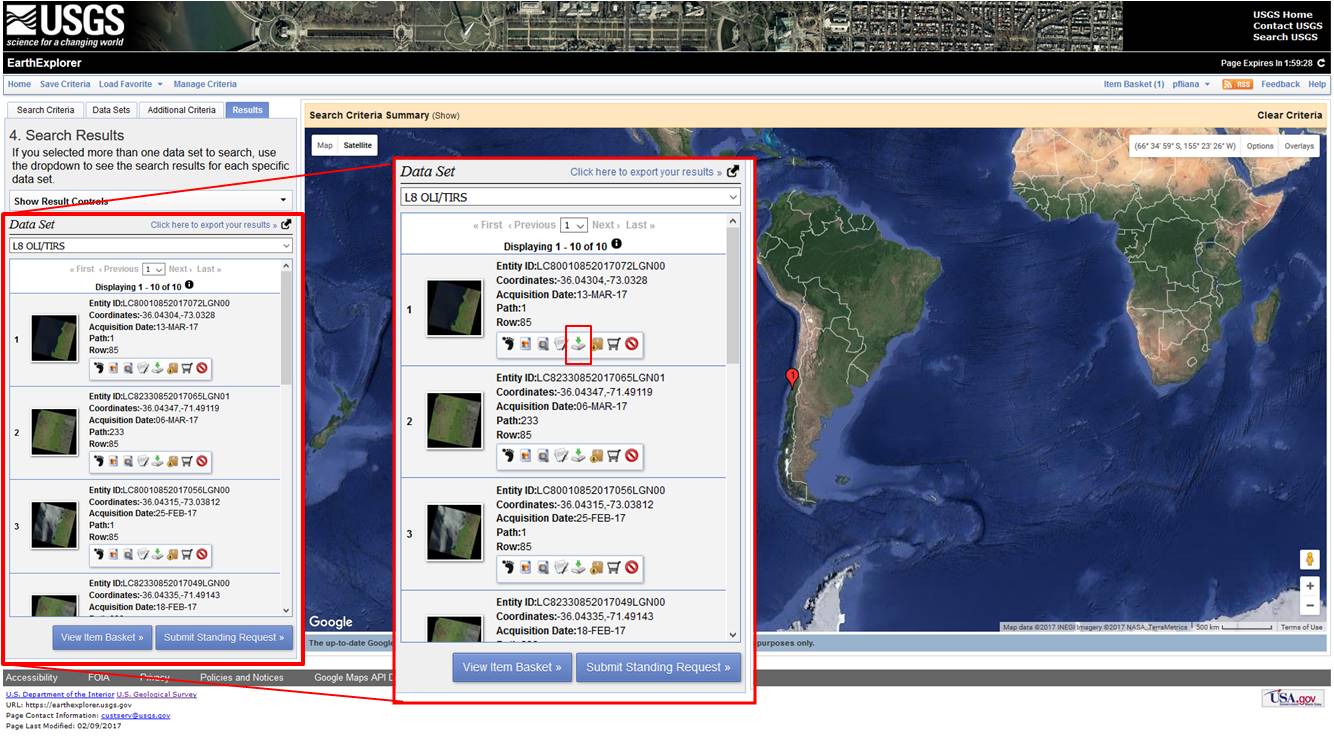
Figure 6. Downloading images.
TIP: If you would like to have an assessment from when the fire was still burning, please also download the 24 January 2017 image.
9. Download Level 1 GeoTIFF images
After clicking the download icon, please select the images from Level 1 GeoTIFF Data Product to download (Figure 7). This option will download all the bands separately. Please note: depending on the internet connection, downloading Level 1 images can take some time. The quality of internet connection will determine the time it takes for the Level 1 images to download.
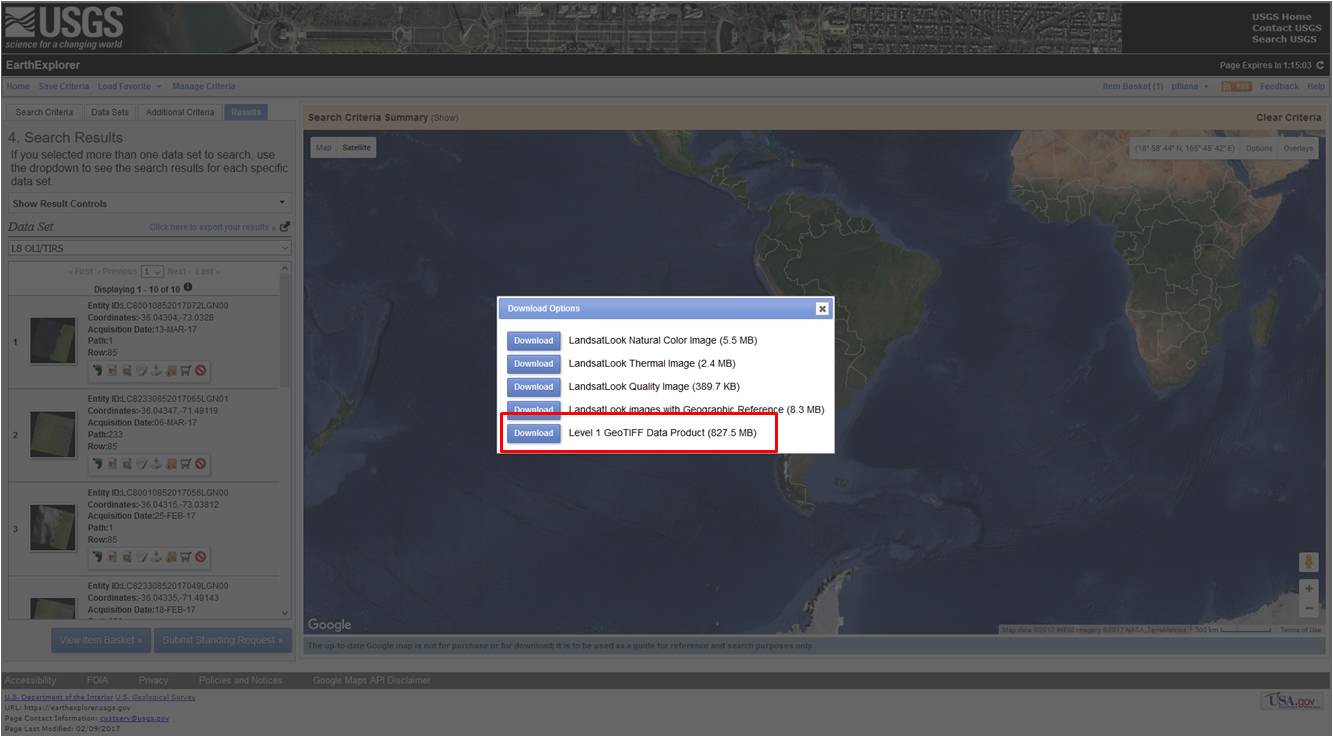
Figure 7. Slecting Level 1 GeoTIFF DataProduct.
To download the shapefile of Empedrado, Chile, please click on the attachment below.